Wednesday, March 9, 2011

Military Ball Hairstyle

Girl Easter Carnival in Venice

Photobucket

This tutorial has been made with Corel PSP X
but can be done with any other version

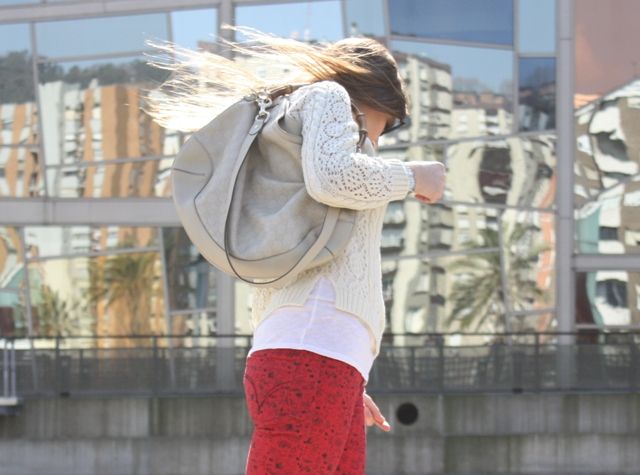
* The tube "6Aika6-St_Patricks_Day" is Jan and belongs to: deviantart
* The tube "yp_bowtie_green" belongs to: yorkshirelassdesigns
* The Mask "CM-STP-112" do not know who owns
My thanks


Filters:
not used


Material
Photobucket

For any problems that may arise, remember
save your work often

Photobucket

started:

1 .- Open a new transparent cloth 700 x 700
With paint bucket tool, paint color # ffffff (White) 2 .-

Preset Shape Tool / Ellipse / Circle
Tikeados: Show Nodes and Create on Vector / Width 15
Color Palette: Foreground: # 29741f

Draw a circle Layers / Convert to Raster Layer
Remove the white layer

3 .- Open "CM-STP-112 (Mask) Minimize
Layers. New raster layer
Paint color # 29741f
Layers. New mask layer. From an image. Select
the mask. Brightness of origin. Do not invest

Apply mask layers. Opacity Merge Group
50
With Eraser tool, wipe off what stands out the circle. To better see what you
cleared, placed below this layer, a layer of white paint. Once everything is clean, remove this white layer.

4 .- Open "6Aika6" (Girl Patrick)
Copy and paste as new layer
Image. Resize: 60%
(Resize all layers tikeado not) depending on model
Show
With Eraser tool, remove the two copys to leave the tube clean
Set. Sharpness. Focus
3D Effects. Shade: 1/1/100/1/negro

5 .- Open "YP-bowtie_green" (Lazo)
Copy and paste as new layer Image
. Resize 60% / 60% / 80%
Set. Sharpness.
focus more 3D Effects. Shade: 1/1/100/1/negro
Locating the right as
Layers model. Duplicate. Locating the right, below the first loop
Layers. Duplicate. Fall to the left to model

6 .- Layers. New Raster Layer Put the copy

Layers. Merge Visible

7 .- Save as PNG

And presto!

I hope you enjoyed it Thanks for making

Besitos

Photobucket

If you see any mistakes in the explanations of
this tutorial, I will thank you for
tells me correct it immediately. Thanks
rosasblog@gmail.com


Tutorial by © Artemis-March-2011
Authorship Respecting
Reproduction or copying of this
Tutorial without asking my permission

Complaint Medical Malpractice


Photobucket

This tutorial has been made with Corel PSP X
but can be done with any other version

* The tubes "calguismistedface59211" and "calguismistedpinkface50211" belong to
ism
* The tube Corine.vicaire Miss Venise ... know your site ... My thanks


Filters:
FM Tile Tools / Blend Emboss
Unlimited / Photo Aging Kit / Centerspot / Vignettigg
Unlimited / Image Enhancement / Sunshine
Adjuts / Variations
AAA Frames / Works Frame Material


Photobucket

For any problems that may arise, remember
save your work often

Photobucket

started:

1 .- Open a new transparent cloth 680 x 480
Color Palette :
Focus: color # 8080ff
Fund: color # ffffff (White)
Form a gradient with two colors / Linear / Angle 0/Repeticiones 1/No invest
Paint the cloth with this gradient.

2 .- Open "My Corine.vicaire Venise" (Landscape)
Copy and paste as new layer Effects
. Filter FM Tile Tools / Blend ambush / Values:
-1.000/-1.000/0.250/64/0.938/0.938/0.938 Wrap Edge
tikeado
Apply twice

3 .- Open "calguismistedface50211" (Girl with a mask in hand)
Copy and paste as new layer Image
. Resize 80%
Set. Sharpness. Locate
focus more on the left as
model
4 .- Open "calguismistedpinkface50211" (Girl pink mask)
Copy and paste as new layer Place
right to model
Layers / Merge / Flatten

5 .- Effects. Filter Unlimited / Photo Aging Kit/Centerspot/Vignetting/192

6 .- Effects. Unlimited / Image Enhancement/Sunshine/64/64

7 .- Effects. Filter Adjuts / Variations
A click on "Original"
A click on "More Green" Ok
Duplicate this image and book

8 .- Image. Add Border: 1 px Color: # ae267a

9 .- Image. Adding Borders: 25 px color: # ffffff (white)
With Wand tool to select this edge
reserved Copy and paste the image in the selection
Image.
Mirror Set. Blur / Gaussian Blur: 30

10 .- Effects. AAA Filter Frames / Frame Works / Values:

Photobucket

11 .- Image. Resize: 95%
Set. Sharpness. Focus
12 .- Layers. New Raster Layer Put the copy

Layers. Merge. Flatten


13 .- Save as PNG

And presto!

I hope you enjoyed it Thanks for making

Besitos

Photobucket

If you see any mistakes in the explanations of
this tutorial, I will thank you for
tells me correct it immediately. Thanks
rosasblog@gmail.com


Tutorial by © Artemis-March-2011
Authorship Respecting
Reproduction or copying of this
Tutorial without asking my permission

Tuesday, March 8, 2011

Easiest Behind The Wheel Dmv In Los Angeles

GRAFFITI...

Graffiti
Graffiti
Graffiti
Grafitti
Graffiti
Graffiti
Yes! I know! I'm obsessed with Isabel Marant collection! I can not help, I lost ... The other clone was seeing at a distance and I almost feel bad! I have not seen the original in person but of course, for 14.90 euros (rebajados!), I'll He delighted, these pants are pure trend and next year I will give no pain to see them in the back of my closet! , P


Jeans: White
Jersey: Zara (TRF)
T-shirt: Zara (Antique)
Shoes: Zara (Antiques )
Bag: Gucci